The Wizard of Oz Crochet: Dorothy Doll

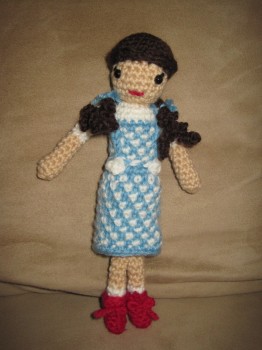
My finished Dorothy doll.

My finished Dorothy doll.

Like many kids her age, my daughter loves “The Wizard of Oz” (both the book and movie), so when I stumbled across The Wizard of Oz Crochet by Kristen Rask while looking for another crochet book online, I immediately bought it.

The book actually comes as part of a kit. Along with the instructions for making 12 characters, the kit contains: a 4.0 mm metal hook; two sets of black safety eyes; two colors of embroidery floss; a tapestry needle; stuffing; and yarn to make the Tin Man and Cowardly Lion. It is a complete kit for making those two characters, which I think is particularly nice. How often have you bought a kit to make something only to discover half way through the project that you needed to purchase other items to actually complete the project? Not so with this kit!

The 12 instructions included in The Wizard of Oz Crochet are for: Dorothy; Toto (with basket); the Scarecrow; the Tin Man; the Cowardly Lion; Glinda the Good Witch; the Wicked Witch of the East; the Wicked Witch of the West; a Winged Monkey; a Lollipop Kid; the Wizard of Oz; and a pair of Ruby Slippers. All of them are quite cute and really look like what they’re supposed to be.

So that’s the good news–a complete kit for making the Tin Man and Cowardly Lion, and cute designs. The bad news is that the pattern instructions (or at least those I’ve attempted so far) contain many, many errors.

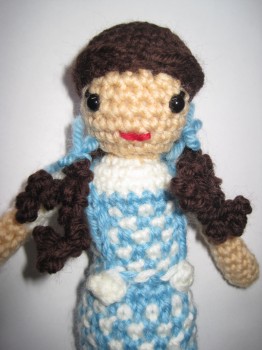
A close-up of Dorothy.

A close-up of Dorothy.

My first project from this book was Dorothy. On Round 3 of the head (the first part of the doll you make), I encountered the first error. The instructions for Round 3 were “*sc, 2sc in next stitch* (24).” It is mathematically impossible to start with 12 stitches and have 24 stitches at the end of Round 3 following those instructions. I am not as good a crocheter as a knitter, but thankfully I’m experienced enough to have been able to figure out what to do to create the doll’s head–I chose to follow the written instructions and to ignore the stitch count. So for Round 3, I repeated “sc, 2sc” around and ended with 18 stitches. For the rest of the head, I continued to follow the written instructions and ignored the stitch count, and my head was round and the size it was supposed to be.

Overall, the errors for making Dorothy were with stitch counts. Which aren’t such a big deal IF you know enough about crochet to figure out to ignore them. There were only three errors that I’d call “substantive,” where you cannot follow the instructions as written and have your doll turn out properly. (See below for all of my Dorothy corrections.)

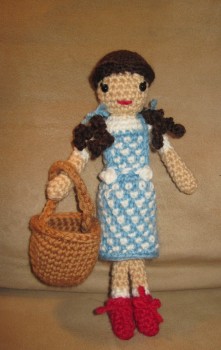
Dorothy with Toto's basket.

Dorothy with Toto’s basket.

It’s such a shame though, because The Wizard of Oz Crochet book is sold as part of a kit and therefore seemingly a nice gift and good for a beginner. But a beginning crocheter would be totally lost with these instructions. And the errors are not just with the Dorothy pattern–I started the Toto pattern and found even more errors, and many of them substantive, not just stitch counting mistakes. I have taken a break from Toto because my crochet skills are not good enough to quickly and easily figure out how to fix Toto’s pattern. I keep checking online for corrections from the book’s publisher, but I haven’t seen any yet. So Toto may just have to wait.

Luckily Dorothy turned out well and my daughter was thrilled with her new doll. Dorothy is really cute, and once I figured out how to correct her pattern, she was fun to make. For my Dorothy doll, I chose to make her legs a little longer so they wouldn’t look stumpy. By making her legs longer, my completed Dorothy is approximately 8″ tall, which is an inch taller than the finished doll according to the pattern. Although how you put your doll together (sewing the legs onto the body, etc.) will affect its height also. Overall I’m pleased with the results, as is my daughter, which we all know is what really counts when making a doll for your little one.

Here are my corrections to the Dorothy doll pattern:

Posted in Book Review, Crocheting | Tagged , , , , , , , , | 36 Comments

Do You Need More Color in Your Life?

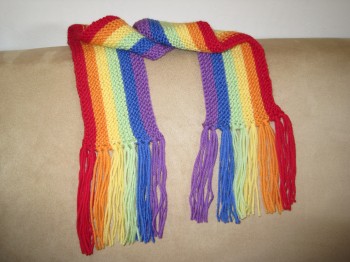
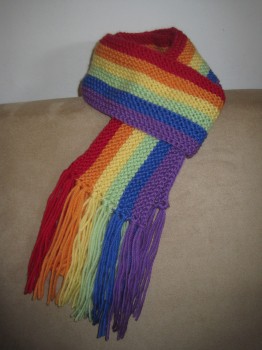
IMG_2190I designed this colorful scarf for a rainbow-loving little girl.  Not only does it contain (almost) all the colors of the rainbow,1 but if draped around the neck and left to hang down in front it actually looks like a rainbow, or at least like a child often draws one (a tall arch).

This pattern is 100% garter stitch and thus very easy (and a perfect project for a beginning knitter).  And if you choose to add fringe, as I did, there are no ends to weave in–each tail becomes part of the fringe.  If you’re not a fan of fringe, you can forego it and there’s just minimal finishing work.

If rainbows aren’t your thing but you’d like to make a quick, easy, and colorful scarf, this pattern can still work for you: you can change the order of the colors, use entirely different colors more suited to your taste, or pick six shades of your favorite color and create a beautiful ombré scarf.

For those of you wanting more color in your life (or at least in your wardrobe), here’s my Rainbow Scarf pattern:


  1. I chose to make a “simplified” rainbow and left out indigo, which is really just a combination of blue and purple. And since this scarf was for a young child, I suspected the indigo wouldn’t be missed given that most kids first learn rainbows not as Roy G. Biv, but as red, orange, yellow, green, blue, purple.  As I typed these colors, through my head played the song my daughter was taught in kindergarten to memorize the order of a rainbow’s colors…and which she sang every time she saw a rainbow…and we have a rainbow maker hanging in one of our windows…you see where this is going, and why I immediately heard that song in my head. []
Posted in Knitting | Tagged , , , , , , , | Comments Off on Do You Need More Color in Your Life?

My Version of Kristin Omdahl’s Radiance Scarf, with Artyarns Beaded Silk Light

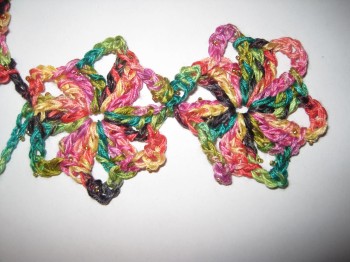
My swatch for Kristin Omdahl's Radiance Scarf from "Seamless Crochet" using a 5.0 mm hook

My swatch for Kristin Omdahl’s Radiance Scarf from Seamless Crochet using a 5.0 mm hook.

I decided to make Kristin Omdahl’s Radiance Scarf1 with my one hank of Artyarns Beaded Silk Light. Since I was using a different yarn from what the pattern called for, I had to estimate how many motifs I could make. I crocheted a swatch of two motifs and weighed and measured how much yarn it took to make them.

By weight, the two motifs used 2.8 g of yarn, and by length the two motifs used 6.85 yds of yarn. I then weighed the entire ball of yarn, which totaled 56.0 g. I don’t own a yarn meter, so for total length, I relied on the yarn’s label, which said there were 160 yds in all.

Then, doing a little math, I calculated that according to length of yarn used, I could make 46 motifs2. And by weight, I calculated I could make 40 motifs3. To be safe–so I (hopefully) wouldn’t run out of yarn–I chose to make the smaller number of motifs. Interestingly, 40 motifs is the same number of motifs called for in Kristin’s original pattern for the Radiance Scarf, which used a laceweight mohair and silk blend yarn.4

I had never worked with Artyarns Beaded Silk Light before and I wondered how making a swatch and then pulling it out to reuse the yarn for the actual scarf would affect the silk yarn. Silk is a strong fiber, but it’s somewhat delicate, plus there were the beads to consider here. I unwound my swatch and there was no harm to the yarn–the yarn wasn’t kinked and didn’t appear “worn” at all.

IMG_7771

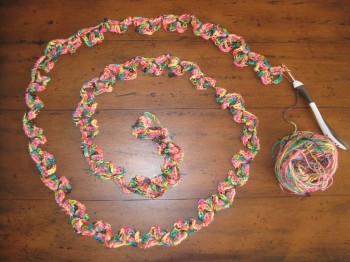
My scarf in progress, with 40 partial motifs. Now I’m ready to start back along the chain and finish the motifs.

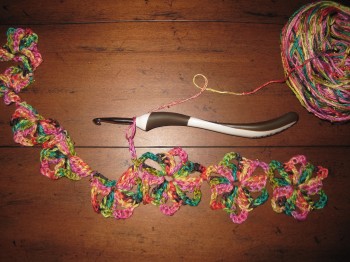
As I discussed in my previous post, Kristin’s design is such that you join motifs as you go and only complete part of each motif before moving onto the next. When you get to your last motif, you complete it and then start back along your chain of almost-finished motifs to complete them. To ensure that I wouldn’t run out of yarn, I decided that before starting back along my chain and finishing the motifs, I would reweigh the remaining ball of yarn to make sure I had enough to finish all 40 motifs. If I didn’t have enough to finish, I would just take out a few motifs before starting back, and have less than 40 motifs total. Thankfully I didn’t have to do that because when I reweighed the yarn it was enough to finish off all 40 motifs based on my earlier calculations.5

IMG_7788

Starting back along the chain and finishing off the motifs.

I knew the scarf would be colorful given my yarn choice, but I wasn’t sure if it would be too much color (and garish). The more I crocheted with this yarn, and the longer my chain of motifs, the more I liked it. It certainly was going to be highly colorful, but I also thought it was really pretty. And because of the design–a long, thin scarf with a floral motif–it was going to look almost necklace-like.

This scarf will instantly add color and flair to any outfit; it will really pop against a solid-colored shirt; and the silk will feel divine around the neck. I’m really looking forward to wearing it, throwing it on like a piece of jewelry. Now I just have to block it to really open up those motifs and showcase the beautiful yarn.

IMG_7849

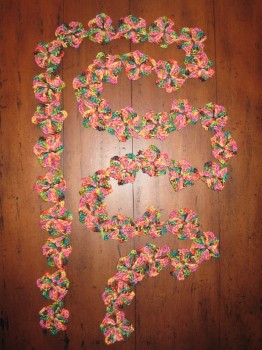
My finished, pre-blocked Radiance Scarf.

The overall dimensions of my scarf, before blocking, are 2.25″ wide and 80″ long. I’ll remeasure after I block it and post an update, along with pre- and post-blocking photos.

  1. The pattern is found in Kristin’s Seamless Crochet book. []
  2. 160 yds total divided by 6.85 yds per 2 motifs = 23.36 repeats of 2 motifs, which means 46.73 motifs total. []
  3. 56.0 g total divided by 2.8 g per 2 motifs = 20 repeats of 2 motifs, or 40 motifs. []
  4. The original yarn is Tilli Tomas, Symphony Lace with Beads and Glitter, which is a blend of kid mohair (63%), silk (10%), nylon (18%), and wool (9%). []
  5. I actually had 8.0 g of yarn leftover after fully completing my scarf, so I had more than plenty to crochet a swatch or two and still complete 40 motifs. Of course I couldn’t be certain of having leftover yarn until I completed the scarf; I’m glad I erred on the side of caution and unwound my swatches to give myself the most yarn possible, just in case I miscalculated and needed it in the end. []
Posted in Crocheting | Tagged , , , , , , , | 1 Comment